+++
author = "@uphiago"
title = "Signing Modules in UEFI Environments"
slug = "secure-boot"
date = 2025-03-27T12:10:31-03:00
description = "Set up Secure Boot on Linux and learn how to sign kernel modules with your own MOK key."
tags = [
"linux",
"bios",
"nvidia",
"distro",
"kernel",
"debian",
]
authors = ["uphiago"]
draft = false
+++
----
With the rise of AI applications that demand high-performance GPUs, it's becoming increasingly common to require custom modules, including NVIDIA's open-source drivers. These modules must be manually signed to function correctly on Linux distributions with Secure Boot enabled.
This guide walks you through creating and registering your own key (MOK) in UEFI firmware, allowing you to securely sign custom modules—without disabling Secure Boot.
## 1. Secure Boot and MOK Concepts
- **Secure Boot** is a firmware feature that only loads binaries signed with trusted keys. On various Linux distributions, the "shim" binary is used, pre-signed by Microsoft, ensuring broad compatibility.
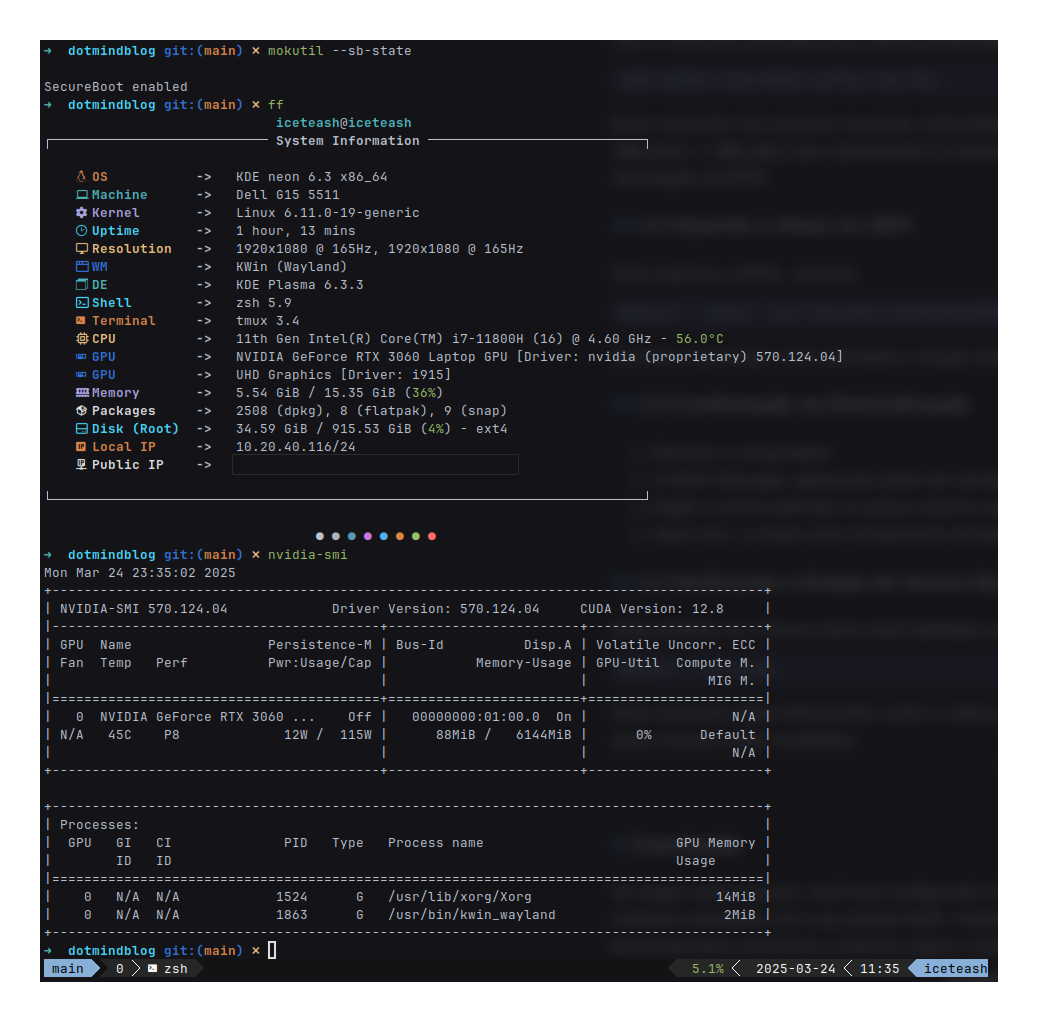
- Check the status of Secure Boot:
```bash
mokutil --sb-state
```
- **MOK** (Machine Owner Key) is a key used to sign kernels/modules (e.g., NVIDIA drivers, DKMS) within the firmware while keeping Secure Boot enabled.
## 2. Generating and Registering the MOK
1. On Debian/Ubuntu-based distributions, generate a new MOK key with:
```bash
sudo mkdir -p /var/lib/shim-signed/mok/
sudo openssl req -nodes -new -x509 -newkey rsa:2048 \
-keyout /var/lib/shim-signed/mok/MOK.priv \
-outform DER -out /var/lib/shim-signed/mok/MOK.der \
-days 36500 -subj "/CN=My Secure Boot Key/"
```
This will create `MOK.der` and `MOK.priv` in `/var/lib/shim-signed/mok/`. Verify:
```bash
ls -l /var/lib/shim-signed/mok/
```
2. Import the public key (MOK.der) into UEFI firmware using:
```bash
mokutil --import /var/lib/shim-signed/mok/MOK.der
```
Set a password, which will be requested during the next boot. Then reboot your system.
3. During the next boot, the system will automatically enter the MOK Manager (Shim).
## 3. Step-by-Step in the MOK Manager
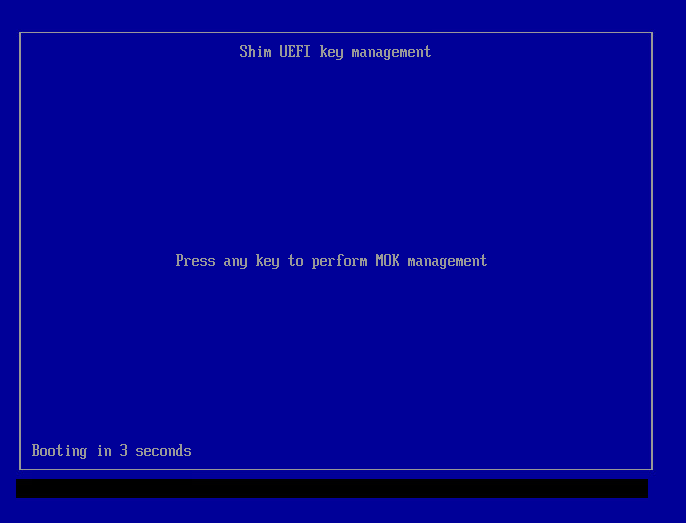
1. Once the machine restarts, the UEFI key management utility “Shim” should appear. Press any key to begin.
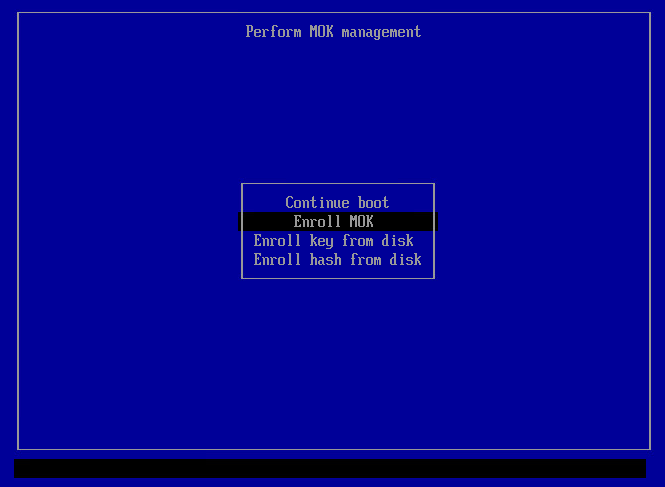
2. Select **Enroll MOK**.
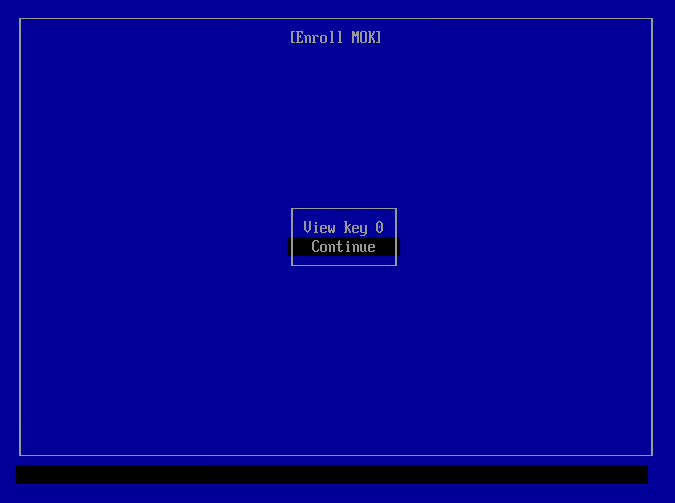
3. Select **Continue**.
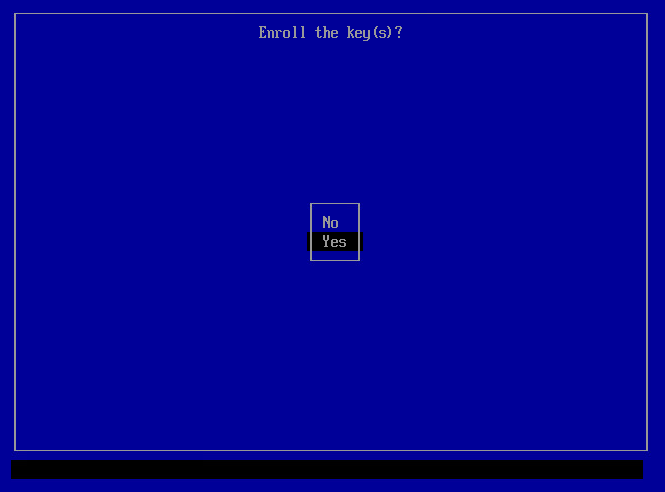
4. Select **Yes**.
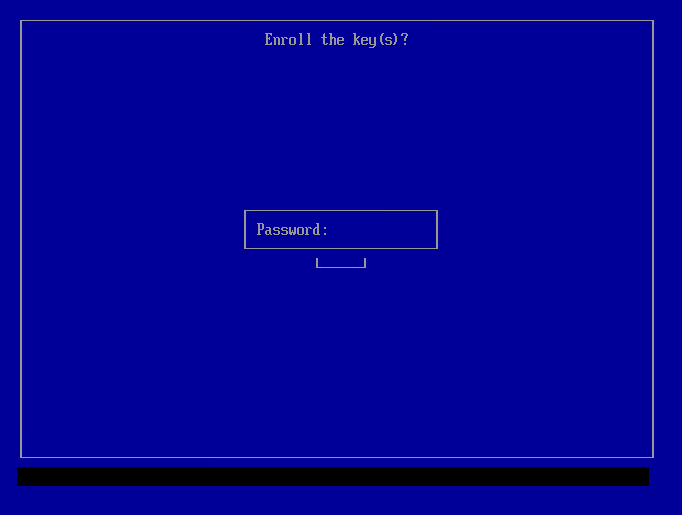
5. Enter the password you chose when importing the key.
6. The **Perform MOK management** screen will reappear. Select **Reboot**.
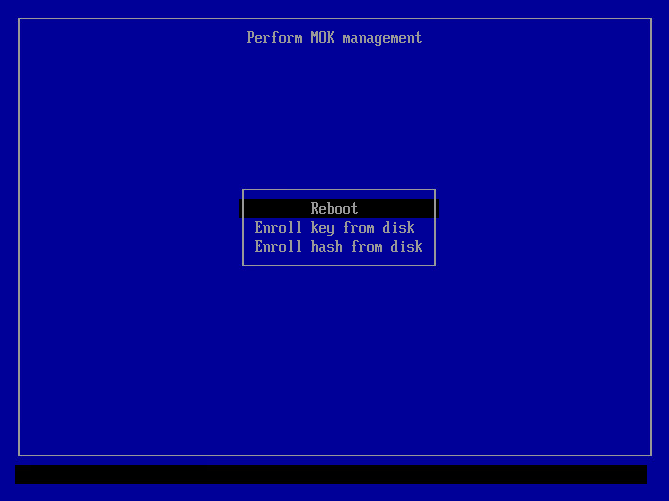
After returning to the operating system, your key will be included in the firmware.
## 4. Signing New Modules (e.g., NVIDIA/DKMS)
If you're using DKMS, configure the file `/etc/dkms/framework.conf` to point to your MOK. This way, any recompiled modules are signed automatically.
```bash
mok_signing_key="/var/lib/shim-signed/mok/MOK.priv"
mok_certificate="/var/lib/shim-signed/mok/MOK.der"
```
In most common scenarios (DKMS modules), you won't need to manually sign modules often. Make sure your DKMS framework is set up as shown above.
- Manual signing (if needed):
Replace `nvidia` with `` to locate the desired module:
```bash
sudo modinfo -n nvidia
```
Decompress the module into a temporary file:
```bash
sudo zstd -d /lib/modules/$(uname -r)/updates/dkms/nvidia.ko.zst -o /tmp/nvidia.ko
```
Sign the newly decompressed module:
```bash
sudo /usr/src/linux-headers-$(uname -r)/scripts/sign-file sha256 \
/var/lib/shim-signed/mok/MOK.priv \
/var/lib/shim-signed/mok/MOK.der \
/tmp/nvidia.ko
```
Overwrite the signed module:
```bash
sudo zstd -f --rm /tmp/nvidia.ko -o /lib/modules/$(uname -r)/updates/dkms/nvidia.ko.zst
```
Rebuild the module cache:
```bash
sudo depmod -a
```
If necessary, update the initramfs to reflect changes for modules loaded at boot:
```bash
sudo update-initramfs -u -k $(uname -r)
```
- (Optional) Script to view all modules and confirm their signatures:
```bash
for mod in /lib/modules/$(uname -r)/updates/dkms/*.ko.zst; do
out="/tmp/$(basename "$mod" .zst)"
zstd -d "$mod" -o "$out"
echo ">>> $(basename "$out")"
modinfo "$out" | grep signer
done
```
## 5. Best Practices & Precautions
- **Important**: keep your private keys safe.
- If you lose this key or forget the password, you will need to generate and import a new MOK.
- Check logs (dmesg, journalctl) for errors such as “module signature verification failed”.
- On some motherboards or VM configurators (e.g., Hyper-V), you must configure Secure Boot to accept “Microsoft UEFI Certificate Authority” keys before generating or importing the MOK.
## References
- [Wiki Debian - SecureBoot](https://wiki.debian.org/SecureBoot#MOK_-_Machine_Owner_Key)
- [Arch Linux Wiki - Secure Boot](https://wiki.archlinux.org/title/Unified_Extensible_Firmware_Interface/Secure_Boot)
- [Dynamic Kernel Module Support](https://wiki.archlinux.org/title/Dynamic_Kernel_Module_Support)=